AVD - Android Virtual Device
Thank you very much to @offsecjay for his help while creating this content.
What is
Android Studio can run Android Virtual Devices (AVDs) for testing APKs. An AVD defines the hardware profile, system image, storage, skin, and other characteristics used by the Android Emulator.[4] To use one, install:
- The Android SDK tools - Download here.
- Or Android Studio (with Android SDK tools) - Download here.
In Windows (in my case) after installing Android Studio I had the SDK Tools installed in: C:\Users\<UserName>\AppData\Local\Android\Sdk\tools
In mac you can download the SDK tools and have them in the PATH running:
brew tap homebrew/cask
brew install --cask android-sdk
Or from Android Studio GUI as indicated in https://stackoverflow.com/questions/46402772/failed-to-install-android-sdk-java-lang-noclassdeffounderror-javax-xml-bind-a which will install them in ~/Library/Android/sdk/cmdline-tools/latest/bin/ and ~/Library/Android/sdk/platform-tools/ and ~/Library/Android/sdk/emulator/
For the Java problems:
export JAVA_HOME=/Applications/Android\ Studio.app/Contents/jbr/Contents/HomeGUI
Prepare Virtual Machine
In current Android Studio versions, open View → Tool Windows → Device Manager, then select Create Virtual Device. Older versions exposed the same workflow as Tools → AVD Manager.[4]
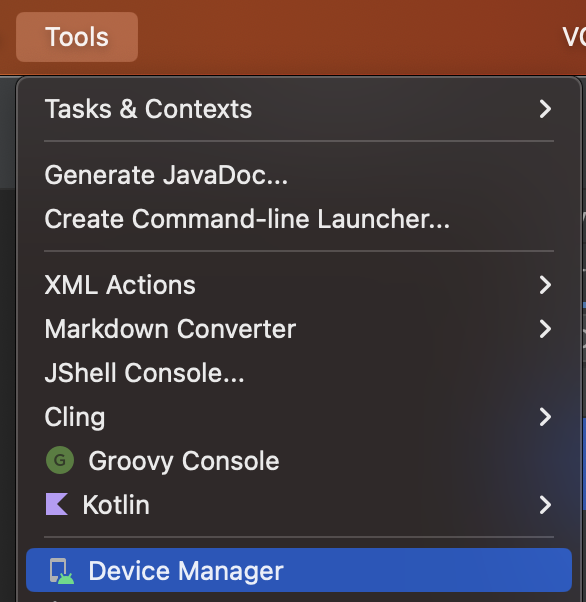
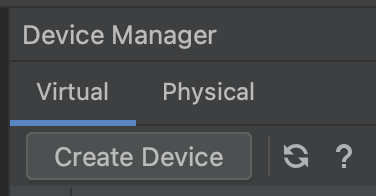
Then, click on Create Virtual Device
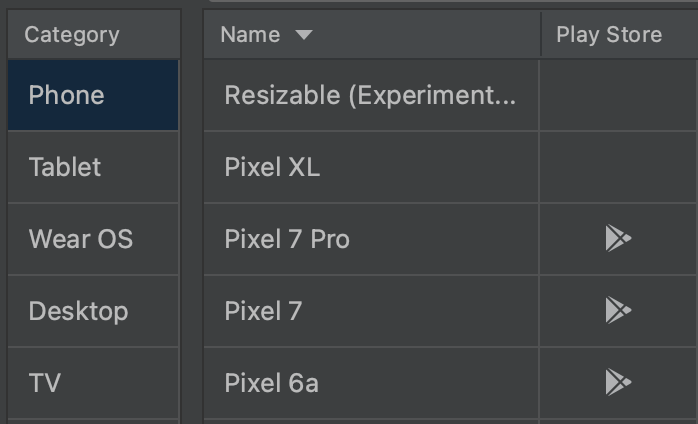
Select the hardware profile you want to use and click Next.
[!WARNING] If you need a phone with Play Store installed select one with the Play Store icon on it!
In the current view you are going to be able to select and download the Android image that the phone is going to run:
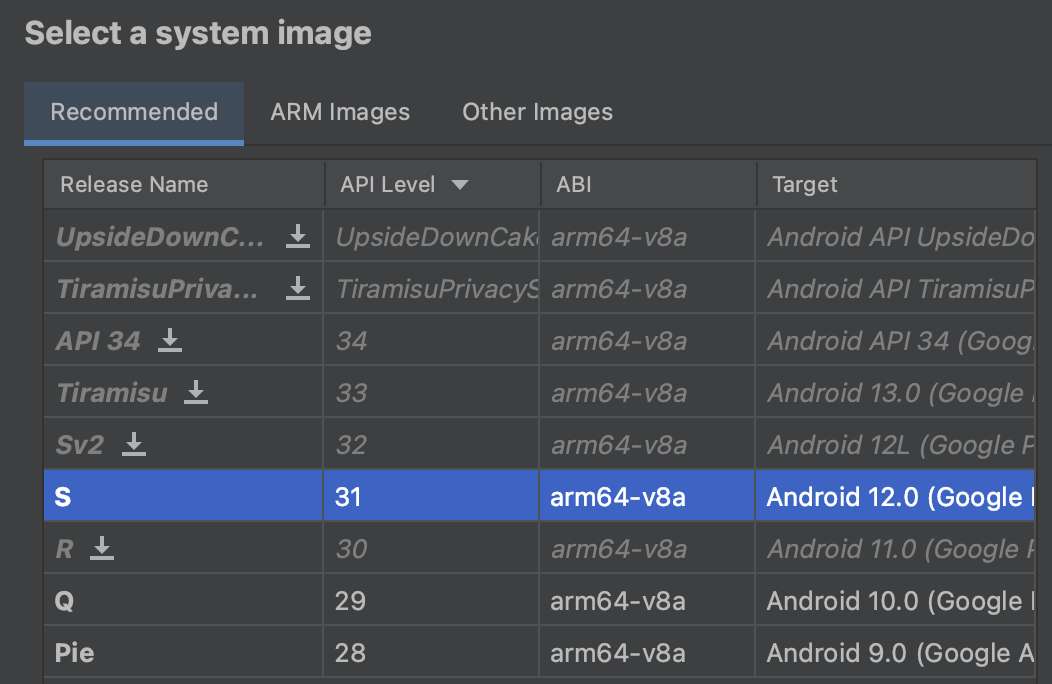
So, select it and if it isn’t downloaded click on the Download symbol next to the name (now wait until the image is downloaded).
Once the image is downloaded, just select Next and Finish.
The virtual machine will be created. Now every time that you access AVD manager it will be present.
Run Virtual Machine
In order to run it just press the Start button.

Command Line tool
[!WARNING] On macOS, current SDK installations commonly place
avdmanagerunder~/Library/Android/sdk/cmdline-tools/latest/bin/and the emulator under~/Library/Android/sdk/emulator/. Older SDK Tools installations used~/Library/Android/sdk/tools/bin/avdmanager; retain that legacy path when reproducing an older lab. Confirm the paths in your SDK installation.
First of all you need to decide which phone you want to use, in order to see the list of possible phones execute:
C:\Users\<UserName>\AppData\Local\Android\Sdk\tools\bin\avdmanager.bat list device

d: 0 or "automotive_1024p_landscape"
    Name: Automotive (1024p landscape)
    OEM : Google
    Tag : android-automotive-playstore
---------
id: 1 or "Galaxy Nexus"
    Name: Galaxy Nexus
    OEM : Google
---------
id: 2 or "desktop_large"
    Name: Large Desktop
    OEM : Google
    Tag : android-desktop
---------
id: 3 or "desktop_medium"
    Name: Medium Desktop
    OEM : Google
    Tag : android-desktop
---------
id: 4 or "Nexus 10"
    Name: Nexus 10
    OEM : Google
[...]
Once you have decided which device profile to use, choose the Android system image to run on it.
You can list all the options using sdkmanager:
C:\Users\<UserName>\AppData\Local\Android\Sdk\tools\bin\sdkmanager.bat --listAnd download the one (or all) you want to use with:
C:\Users\<UserName>\AppData\Local\Android\Sdk\tools\bin\sdkmanager.bat "platforms;android-28" "system-images;android-28;google_apis;x86_64"Once you have downloaded the Android image you want to use you can list all the downloaded Android images with:
C:\Users\<UserName>\AppData\Local\Android\Sdk\tools\bin\avdmanager.bat list target
----------
id: 1 or "android-28"
     Name: Android API 28
     Type: Platform
     API level: 28
     Revision: 6
----------
id: 2 or "android-29"
     Name: Android API 29
     Type: Platform
     API level: 29
     Revision: 4
At this moment you have decided the device you want to use and you have downloaded the Android image, so you can create the virtual machine using:
C:\Users\<UserName>\AppData\Local\Android\Sdk\tools\bin\avdmanager.bat -v create avd -k "system-images;android-28;google_apis;x86_64" -n "AVD9" -d "Nexus 5X"In the last command I created a VM named “AVD9” using the device “Nexus 5X” and the Android image “system-images;android-28;google_apis;x86_64”.
Now you can list the virtual machines you have created with:
C:\Users\<UserName>\AppData\Local\Android\Sdk\tools\bin\avdmanager.bat list avd

 Name: AVD9
  Device: Nexus 5X (Google)
    Path: C:\Users\cpolo\.android\avd\AVD9.avd
  Target: Google APIs (Google Inc.)
          Based on: Android API 28 Tag/ABI: google_apis/x86_64

The following Android Virtual Devices could not be loaded:
    Name: Pixel_2_API_27
    Path: C:\Users\cpolo\.android\avd\Pixel_2_API_27_1.avd
   Error: Google pixel_2 no longer exists as a device
Run Virtual Machine
The macOS command paths are described under Command Line tool above.
We have already seen how you can list the created virtual machines, but you can also list them using:
C:\Users\<UserName>\AppData\Local\Android\Sdk\tools\emulator.exe -list-avds
AVD9
Pixel_2_API_27
You can simply run any virtual machine created using:
C:\Users\<UserName>\AppData\Local\Android\Sdk\tools\emulator.exe -avd "VirtualMachineName"
C:\Users\<UserName>\AppData\Local\Android\Sdk\tools\emulator.exe -avd "AVD9"
Or using more advance options you can run a virtual machine like:
C:\Users\<UserName>\AppData\Local\Android\Sdk\tools\emulator.exe -avd "AVD9" -http-proxy 192.168.1.12:8080 -writable-systemCommand line options
However there are a lot of different command line useful options that you can use to initiate a virtual machine. Below you can find some interesting options but can find a complete list here[2]
Boot
-snapshot name: Start VM snapshot-snapshot-list -snapstorage ~/.android/avd/Nexus_5X_API_23.avd/snapshots-test.img: List all the snapshots recorded
Network
-dns-server 192.0.2.0, 192.0.2.255: Allow to indicate comma separated the DNS servers to the VM.-http-proxy 192.168.1.12:8080: Allow to indicate an HTTP proxy to use (very useful to capture the traffic using Burp)- If the proxy settings aren’t working for some reason, try to configure them internally or using an pplication like “Super Proxy” or “ProxyDroid”.
-netdelay 200: Set the network latency emulation in milliseconds.-port 5556: Set the TCP port number that’s used for the console and adb.-ports 5556,5559: Set the TCP ports used for the console and adb.-tcpdump /path/dumpfile.cap: Capture all the traffic in a file
System
-selinux {disabled|permissive}: Set the Security-Enhanced Linux security module to either disabled or permissive mode on a Linux operating system.-timezone Europe/Paris: Set the timezone for the virtual device-screen {touch(default)|multi-touch|o-touch}: Set emulated touch screen mode.-writable-system: Use this option to have a writable system image during your emulation session. You will need also to runadb root; adb remount. This is very useful to install a new certificate in the system.
Linux CLI setup (SDK/AVD quickstart)
The official CLI tools make it easy to create fast, debuggable emulators without Android Studio.[1]
# Directory layout
mkdir -p ~/Android/cmdline-tools/latest

# Download commandline tools (Linux)
wget https://dl.google.com/android/repository/commandlinetools-linux-13114758_latest.zip -O /tmp/cmdline-tools.zip
unzip /tmp/cmdline-tools.zip -d ~/Android/cmdline-tools/latest
rm /tmp/cmdline-tools.zip

# Env vars (add to ~/.bashrc or ~/.zshrc)
export ANDROID_HOME=$HOME/Android
export PATH=$ANDROID_HOME/cmdline-tools/latest/bin:$ANDROID_HOME/platform-tools:$ANDROID_HOME/emulator:$PATH

# Install core SDK components
sdkmanager --install "platform-tools" "emulator"

# Install a debuggable x86_64 system image (Android 11 / API 30)
sdkmanager --install "system-images;android-30;google_apis;x86_64"

# Create an AVD and run it with a writable /system & snapshot name
avdmanager create avd -n PixelRootX86 -k "system-images;android-30;google_apis;x86_64" -d "pixel"
emulator -avd PixelRootX86 -writable-system -snapshot PixelRootX86_snap

# Verify root (debuggable images allow `adb root`)
adb root
adb shell whoami  # expect: root
Notes
- System image flavors: google_apis (debuggable, allows adb root), google_apis_playstore (not rootable), aosp/default (lightweight).
- Build types: userdebug often allows
adb rooton debug-capable images. Play Store images are production builds and block root. - On x86_64 hosts, prefer an x86/x86_64 system image. Some Android 11-era Google images provided per-app ARM translation, but availability and supported ABIs vary by emulator and image release.[3] That translation runs many ARM-only applications inside an x86 system image; it is not the same as full-system ARM64 emulation, which older emulator releases did not provide for newer API images on x86_64 hosts.
Snapshots from CLI
# Save a clean snapshot from the running emulator
adb -s emulator-5554 emu avd snapshot save my_clean_setup

# Boot from a named snapshot (if it exists)
emulator -avd PixelRootX86 -writable-system -snapshot my_clean_setup
ARM→x86 binary translation (Android 11+)
Google APIs and Play Store images on Android 11+ can translate ARM app binaries per process while keeping the rest of the system native x86/x86_64. This is often fast enough to test many ARM-only apps on desktop.[3]
Tip: Prefer Google APIs x86/x86_64 images during pentests. Play images are convenient but block
adb root; use them only when you specifically require Play services and accept the lack of root.
Rooting a Play Store device
If you downloaded a device with Play Store you are not going to be able to get root directly, and you will get this error message
$ adb root
adbd cannot run as root in production builds
Using rootAVD with Magisk I was able to root it (follow for example this video or this one).
Install Burp Certificate
Check the following page to learn how to install a custom CA cert:
Nice AVD Options
Take a Snapshot
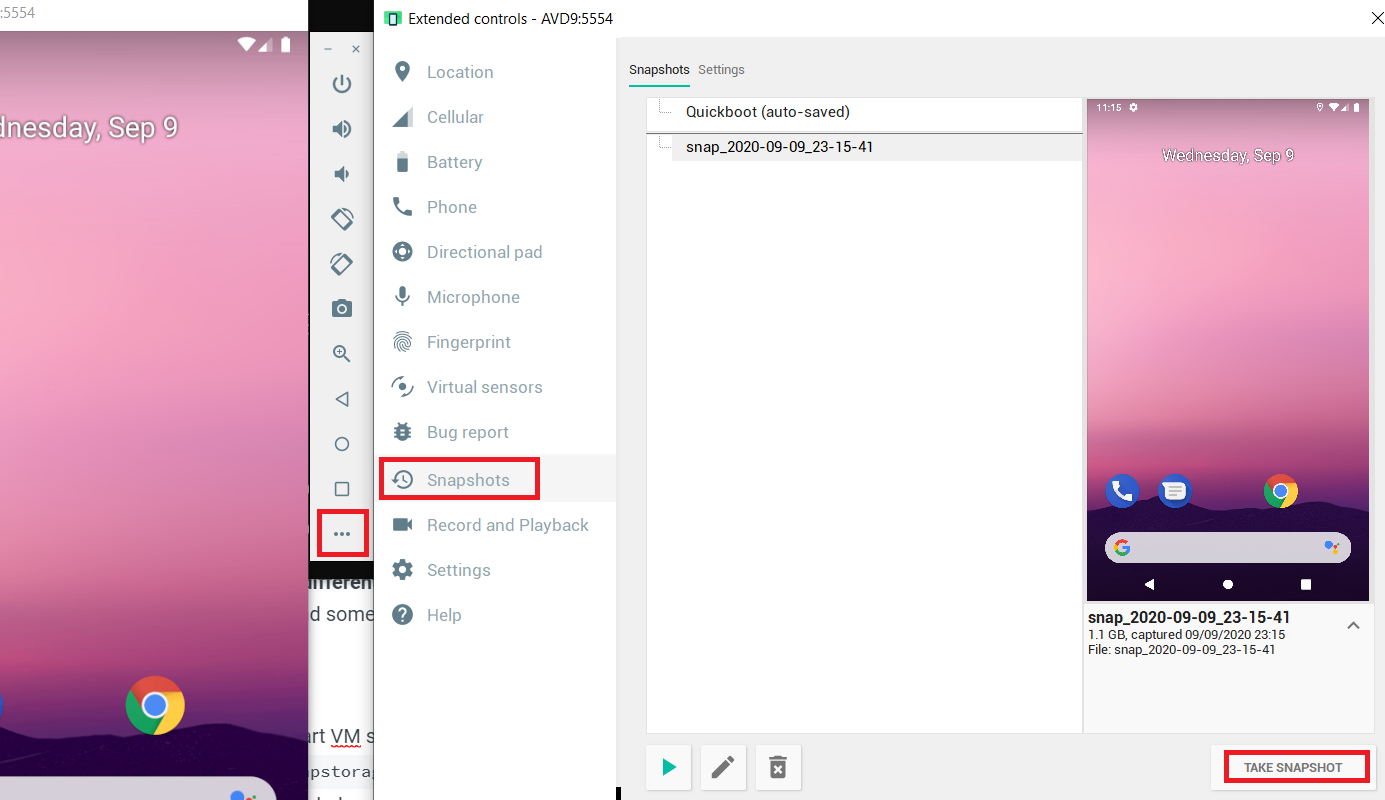
You can use the GUI to take a snapshot of the VM at any time: